This guide covers the Quarkus Dev UI for extension authors.
Quarkus now ships with a new experimental Dev UI, which is available in dev mode (when you start
quarkus with mvn quarkus:dev) at /q/dev by default. It will show you something like
this:
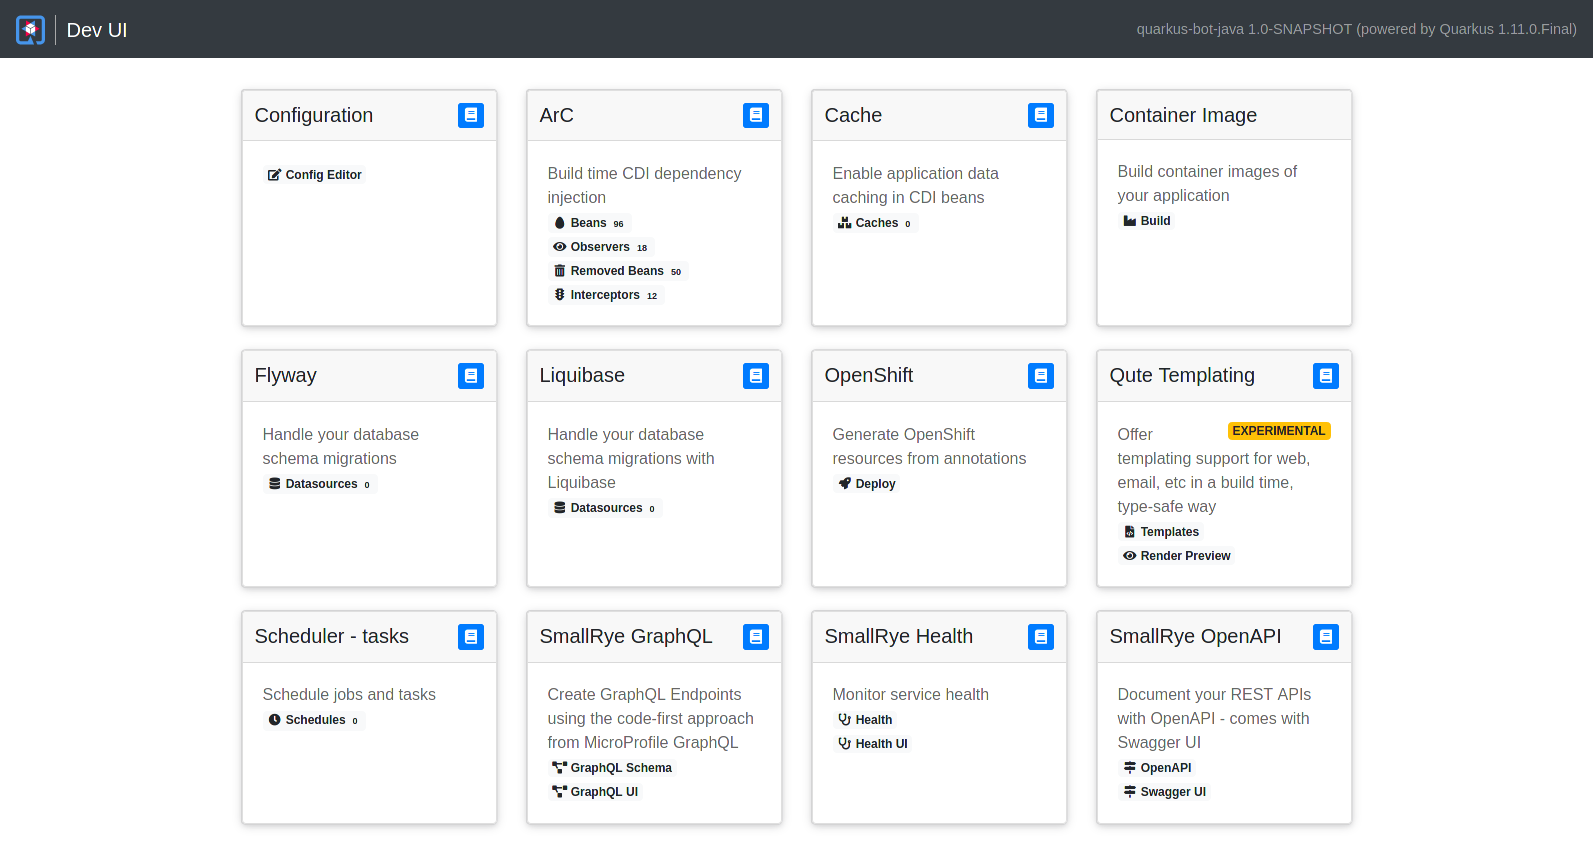
It allows you to quickly visualize all the extensions currently loaded, see their status and go directly to their documentation.
On top of that, each extension can add:
How can I make my extension support the Dev UI?
In order to make your extension listed in the Dev UI you don’t need to do anything!
So you can always start with that :)
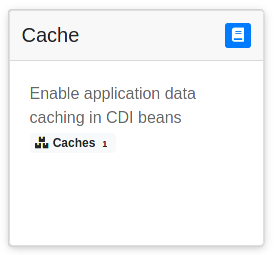
If you want to contribute badges or links in your extension card on the Dev UI overview page, like this:
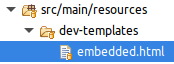
You have to add a file named dev-templates/embedded.html in your
deployment
extension module’s resources:
The contents of this file will be included in your extension card, so for example we can place two links with some styling and icons:
<a href="{config:http-path('quarkus.smallrye-openapi.path')}" class="badge badge-light">
  <i class="fa fa-map-signs fa-fw"></i>
  OpenAPI</a>
<br>
<a href="{config:http-path('quarkus.swagger-ui.path')}/" class="badge badge-light">
  <i class="fa fa-map-signs fa-fw"></i>
Swagger UI</a>| We use the Font Awesome Free icon set. |
Note how the paths are specified: {config:http-path('quarkus.smallrye-openapi.path')}. This is a special
directive that the quarkus dev console understands: it will replace that value with the resolved route
named 'quarkus.smallrye-openapi.path'.
The corresponding non-application endpoint is declared using .routeConfigKey to associate the route with a name:
    nonApplicationRootPathBuildItem.routeBuilder()
            .route(openApiConfig.path) (1)
            .routeConfigKey("quarkus.smallrye-openapi.path") (2)
            ...
.build();| 1 | The configured path is resolved into a valid route. |
| 2 | The resolved route path is then associated with the key quarkus.smallrye-openapi.path. |
Path considerations
Paths are tricky business. Keep the following in mind:
-
Assume your UI will be nested under the dev endpoint. Do not provide a way to customize this without a strong reason.
-
Never construct your own absolute paths. Adding a suffix to a known, normalized and resolved path is fine.
Configured paths, like the dev endpoint used by the console or the SmallRye OpenAPI path shown in the example above,
need to be properly resolved against both quarkus.http.root-path and quarkus.http.non-application-root-path.
Use NonApplicationRootPathBuildItem or HttpRootPathBuildItem to construct endpoint routes and identify resolved
path values that can then be used in templates.
The {devRootAppend} variable can also be used in templates to construct URLs for static dev console resources, for example:
<img src="{devRootAppend}/resources/images/quarkus_icon_rgb_reverse.svg" width="40" height="30" class="d-inline-block align-middle" alt="Quarkus"/>Refer to the Quarkus Vertx HTTP configuration reference for details on how the non-application root path is configured.
Template and styling support
Both the embedded.html files and any full page you add in /dev-templates will be interpreted by
the Qute template engine.
This also means that you can add custom Qute tags in
/dev-templates/tags for your templates to use.
The style system currently in use is Bootstrap V4 (4.6.0) but note that this might change in the future.
The main template also includes jQuery 3.5.1, but here again this might change.
Accessing Config Properties
A config:property(name) expression can be used to output the config value for the given property name.
The property name can be either a string literal or obtained dynamically by another expression.
For example {config:property('quarkus.lambda.handler')} and {config:property(foo.propertyName)}.
Reminder: do not use this to retrieve raw configured path values. As shown above, use {config:http-path(…)} with
a known route configuration key when working with resource paths.
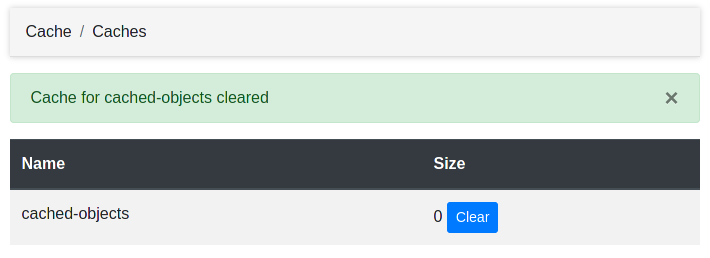
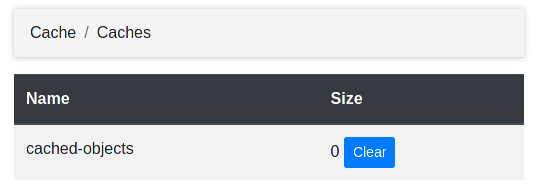
Adding full pages
To add full pages for your Dev UI extension such as this one:
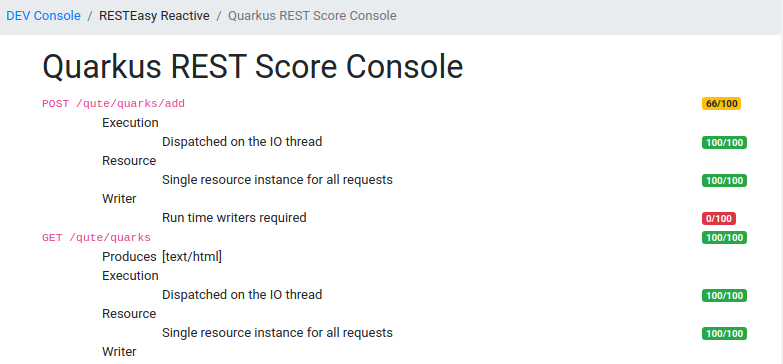
You need to place them in your extension’s
deployment module’s
/dev-templates resource folder, like this page for the quarkus-cache extension:
{#include main}(1)
    {#style}(2)
        .custom {
            color: gray;
        }
    {/style}
    {#script} (3)
     $(document).ready(function(){
        $(function () {
          $('[data-toggle="tooltip"]').tooltip()
        });
    });
    {/script}
    {#title}Cache{/title}(4)
    {#body}(5)
        <table class="table table-striped custom">
            <thead class="thead-dark">
                <tr>
                    <th scope="col">Name</th>
                    <th scope="col">Size</th>
                </tr>
            </thead>
            <tbody>
                {#for cacheInfo in info:cacheInfos}(6)
                    <tr>
                        <td>
                            {cacheInfo.name}
                        </td>
                        <td>
                            <form method="post"(7)
                                  enctype="application/x-www-form-urlencoded">
                                <label class="form-check-label" for="clear">
                                    {cacheInfo.size}
                                </label>
                                <input type="hidden" name="name" value="{cacheInfo.name}">
                                <input id="clear" type="submit"
                                       class="btn btn-primary btn-sm" value="Clear" >
                            </form>
                        </td>
                    </tr>
                {/for}
            </tbody>
        </table>
    {/body}
{/include}| 1 | In order to benefit from the same style as other Dev UI pages, extend the main template |
| 2 | You can pass extra CSS for your page in the style template parameter |
| 3 | You can pass extra JavaScript for your page in the script template parameter. This will be added inline after the JQuery script, so you can safely use JQuery in your script. |
| 4 | Don’t forget to set your page title in the title template parameter |
| 5 | The body template parameter will contain your content |
| 6 | In order for your template to read custom information from your Quarkus extension, you can use
the info namespace. |
| 7 | This shows an interactive page |
Linking to your full-page templates
Full-page templates for extensions live under a pre-defined {devRootAppend}/{groupId}.{artifactId}/ directory
that is referenced using the urlbase template parameter. Using configuration defaults, that would resolve to
/q/dev/io.quarkus.quarkus-cache/, as an example.
Use the {urlbase} template parameter to reference this folder in embedded.html:
<a href="{urlbase}/caches" class="badge badge-light">(1)
  <i class="fa ..."></i>
Caches <span class="badge badge-light">{info:cacheInfos.size()}</span></a>| 1 | Use the urlbase template parameter to reference full-page templates for your extension |
Passing information to your templates
In embedded.html or in full-page templates, you will likely want to display information that is
available from your extension.
There are two ways to make that information available, depending on whether it is available at build time or at run time.
In both cases we advise that you add support for the Dev UI in your {pkg}.deployment.devconsole
package in a DevConsoleProcessor class (in your extension’s
deployment module).
Passing run-time information
package io.quarkus.cache.deployment.devconsole;

import io.quarkus.cache.runtime.CaffeineCacheSupplier;
import io.quarkus.deployment.IsDevelopment;
import io.quarkus.deployment.annotations.BuildStep;
import io.quarkus.devconsole.spi.DevConsoleRuntimeTemplateInfoBuildItem;

public class DevConsoleProcessor {

    @BuildStep(onlyIf = IsDevelopment.class)(1)
    public DevConsoleRuntimeTemplateInfoBuildItem collectBeanInfo() {
        return new DevConsoleRuntimeTemplateInfoBuildItem("cacheInfos",
                      new CaffeineCacheSupplier());(2)
    }
}| 1 | Don’t forget to make this build step conditional on being in dev mode |
| 2 | Declare a run-time dev info:cacheInfos template value |
This will map the info:cacheInfos value to this supplier in your extension’s
runtime module:
package io.quarkus.cache.runtime;

import java.util.ArrayList;
import java.util.Collection;
import java.util.Comparator;
import java.util.List;
import java.util.function.Supplier;

import io.quarkus.arc.Arc;
import io.quarkus.cache.CaffeineCache;

public class CaffeineCacheSupplier implements Supplier<Collection<CaffeineCache>> {

    @Override
    public List<CaffeineCache> get() {
        List<CaffeineCache> allCaches = new ArrayList<>(allCaches());
        allCaches.sort(Comparator.comparing(CaffeineCache::getName));
        return allCaches;
    }

    public static Collection<CaffeineCache> allCaches() {
        // Get it from ArC at run-time
        return (Collection<CaffeineCache>) (Collection)
            Arc.container().instance(CacheManagerImpl.class).get().getAllCaches();
    }
}
Passing build-time information
Sometimes you only need build-time information to be passed to your template, so you can do it like this:
package io.quarkus.qute.deployment.devconsole;

import java.util.List;

import io.quarkus.deployment.IsDevelopment;
import io.quarkus.deployment.annotations.BuildStep;
import io.quarkus.devconsole.spi.DevConsoleTemplateInfoBuildItem;
import io.quarkus.qute.deployment.CheckedTemplateBuildItem;
import io.quarkus.qute.deployment.TemplateVariantsBuildItem;

public class DevConsoleProcessor {

    @BuildStep(onlyIf = IsDevelopment.class)
    public DevConsoleTemplateInfoBuildItem collectBeanInfo(
            List<CheckedTemplateBuildItem> checkedTemplates,(1)
            TemplateVariantsBuildItem variants) {
        DevQuteInfos quteInfos = new DevQuteInfos();
        for (CheckedTemplateBuildItem checkedTemplate : checkedTemplates) {
            DevQuteTemplateInfo templateInfo =
                new DevQuteTemplateInfo(checkedTemplate.templateId,
                    variants.getVariants().get(checkedTemplate.templateId),
                    checkedTemplate.bindings);
            quteInfos.addQuteTemplateInfo(templateInfo);
        }
        return new DevConsoleTemplateInfoBuildItem("devQuteInfos", quteInfos);(2)
    }

}| 1 | Use whatever dependencies you need as input |
| 2 | Declare a build-time info:devQuteInfos DEV template value |
Advanced usage: adding actions
You can also add actions to your Dev UI templates:
This can be done by adding another build step to
declare the action in your extension’s
deployment module:
package io.quarkus.cache.deployment.devconsole;

import static io.quarkus.deployment.annotations.ExecutionTime.STATIC_INIT;

import io.quarkus.cache.runtime.devconsole.CacheDevConsoleRecorder;
import io.quarkus.deployment.annotations.BuildStep;
import io.quarkus.deployment.annotations.Record;
import io.quarkus.devconsole.spi.DevConsoleRouteBuildItem;

public class DevConsoleProcessor {

    @BuildStep
    @Record(value = STATIC_INIT, optional = true)(1)
    DevConsoleRouteBuildItem invokeEndpoint(CacheDevConsoleRecorder recorder) {
        return new DevConsoleRouteBuildItem("caches", "POST",
                                            recorder.clearCacheHandler());(2)
    }
}| 1 | Mark the recorder as optional, so it will only be invoked when in dev mode |
| 2 | Declare a POST {urlbase}/caches route handled by the given handler |
Note: you can see how to invoke this action from your full page.
Now all you have to do is implement the recorder in your extension’s
runtime module:
package io.quarkus.cache.runtime.devconsole;

import io.quarkus.cache.CaffeineCache;
import io.quarkus.cache.runtime.CaffeineCacheSupplier;
import io.quarkus.runtime.annotations.Recorder;
import io.quarkus.devconsole.runtime.spi.DevConsolePostHandler;
import io.quarkus.vertx.http.runtime.devmode.devconsole.FlashScopeUtil.FlashMessageStatus;
import io.vertx.core.Handler;
import io.vertx.core.MultiMap;
import io.vertx.ext.web.RoutingContext;

@Recorder
public class CacheDevConsoleRecorder {

    public Handler<RoutingContext> clearCacheHandler() {
        return new DevConsolePostHandler() {(1)
            @Override
            protected void handlePost(RoutingContext event, MultiMap form) (2)
              throws Exception {
                String cacheName = form.get("name");
                for (CaffeineCache cache : CaffeineCacheSupplier.allCaches()) {
                    if (cache.getName().equals(cacheName)) {
                        cache.invalidateAll();
                        flashMessage(event, "Cache for " + cacheName + " cleared");(3)
                        return;
                    }
                }
                flashMessage(event, "Cache for " + cacheName + " not found",
                             FlashMessageStatus.ERROR);(4)
            }
        };
    }
}| 1 | While you can use any Vert.x handler,
the DevConsolePostHandler superclass will handle your POST actions
nicely, and auto-redirect to the GET URI right after your POST for optimal behavior. |
| 2 | You can get the Vert.x RoutingContext as well as the form contents |
| 3 | Don’t forget to add a message for the user to let them know everything went fine |
| 4 | You can also add error messages |
Flash messages are handled by the main DEV template and will result in nice notifications for your
users:
|